Optimizing Public IPv4 Address Cost in AWS
This document provides information on public IPv4 address usage in AWS and how to estimate associated costs. This document emphasizes the advantages of using Amazon VPC IPAM Public IP Insights to monitor and manage public IPv4 usage. It also provides guidance on how to optimize costs related to public IPv4 charges.
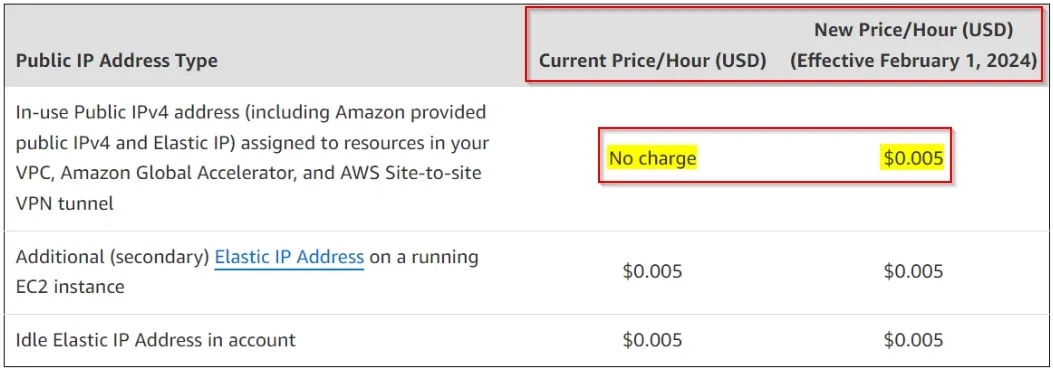
Amazon Web Services (AWS) will now charge for the use of IPv4. While the initial cost of $0.005 may not seem high, it adds up to $43.80 per year, which is close to the price of buying an IPv4 outright. This can be burdensome considering it applies to not only Elastic IPs attached to instances, but also VPN Gateways (two per VPN), Global Accelerator, Public Facing ELBs, and NAT Gateways.
Steps to Prepare
- Identify Your Public IPv4 Addresses: To begin, identify the public IPv4 addresses being used by your AWS resources. AWS offers tools and services that can assist you in efficiently tracking these addresses.
- Evaluate the Need for Public IPs: Assess whether you truly require a public IP for each associated resource. In many cases, private IPs or Network Address Translation (NAT) gateways may be sufficient.
- Review Your EC2 Instances: Analyze your EC2 instances to determine which ones require public IPs. AWS recommends using private IPs whenever possible to reduce costs.
Identifying Public IPv4 Addresses (Monitoring Public IPs)
This involves creating IPAM and visualizing the insights of public IPs.
Step 1: Open the IPAM console at https://console.aws.amazon.com/ipam/.
Step 2: In the navigation pane, choose Public IP insights. 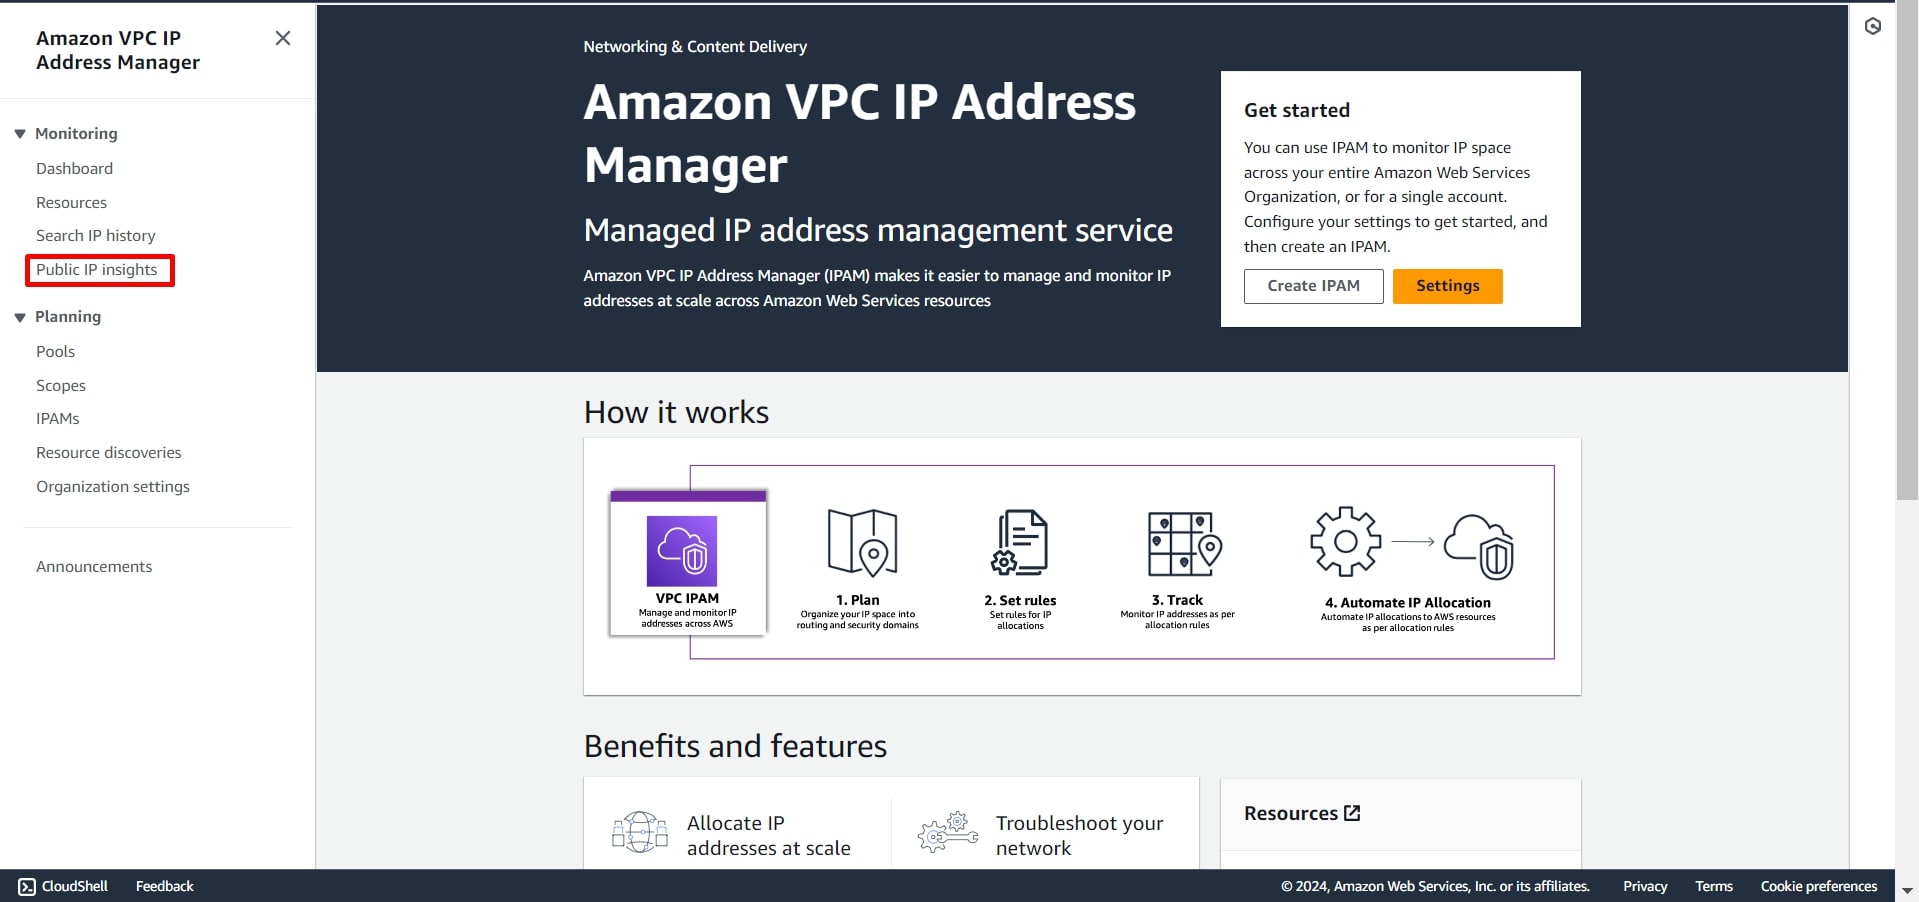
Step 3: If no IPAM has been created, click on Create IPAM. 
Step 4: Start by creating an IPAM with a free tier that offers limited features but provides insights into all your public IPv4 addresses. 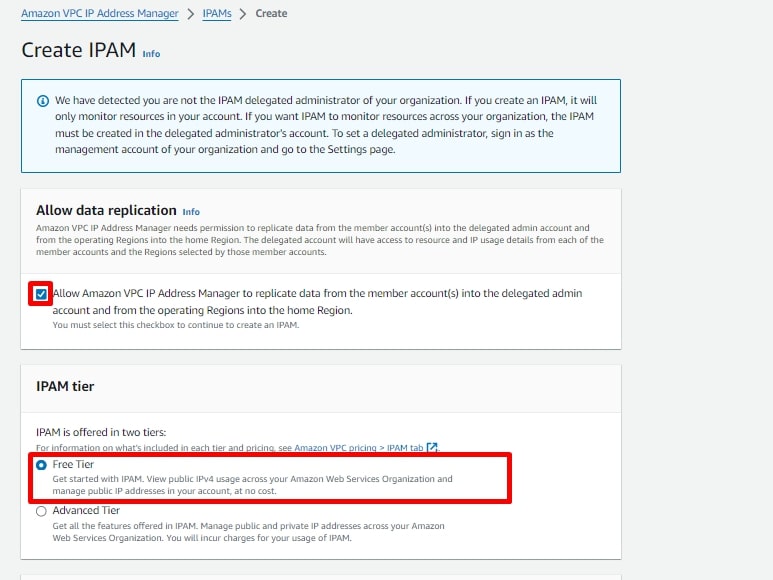
Step 5: Provide the name and description, and also select the region for the IPAM. Then, click on Create IPAM . 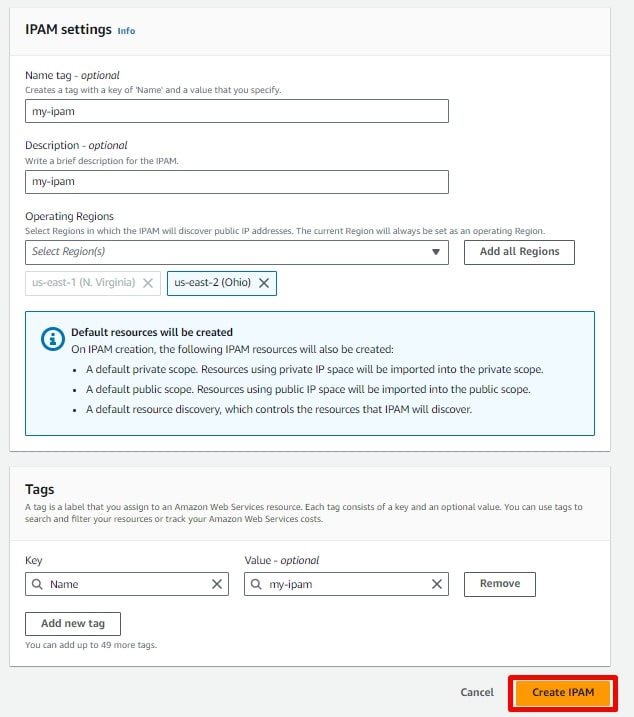
Step 6: After creating IPAM, you will need to wait for some time to obtain insights on Public IP.
Step 7: After some time, to view details for a public IP address, select an IP address by clicking on it.
Step 8: View the following information about the IP address 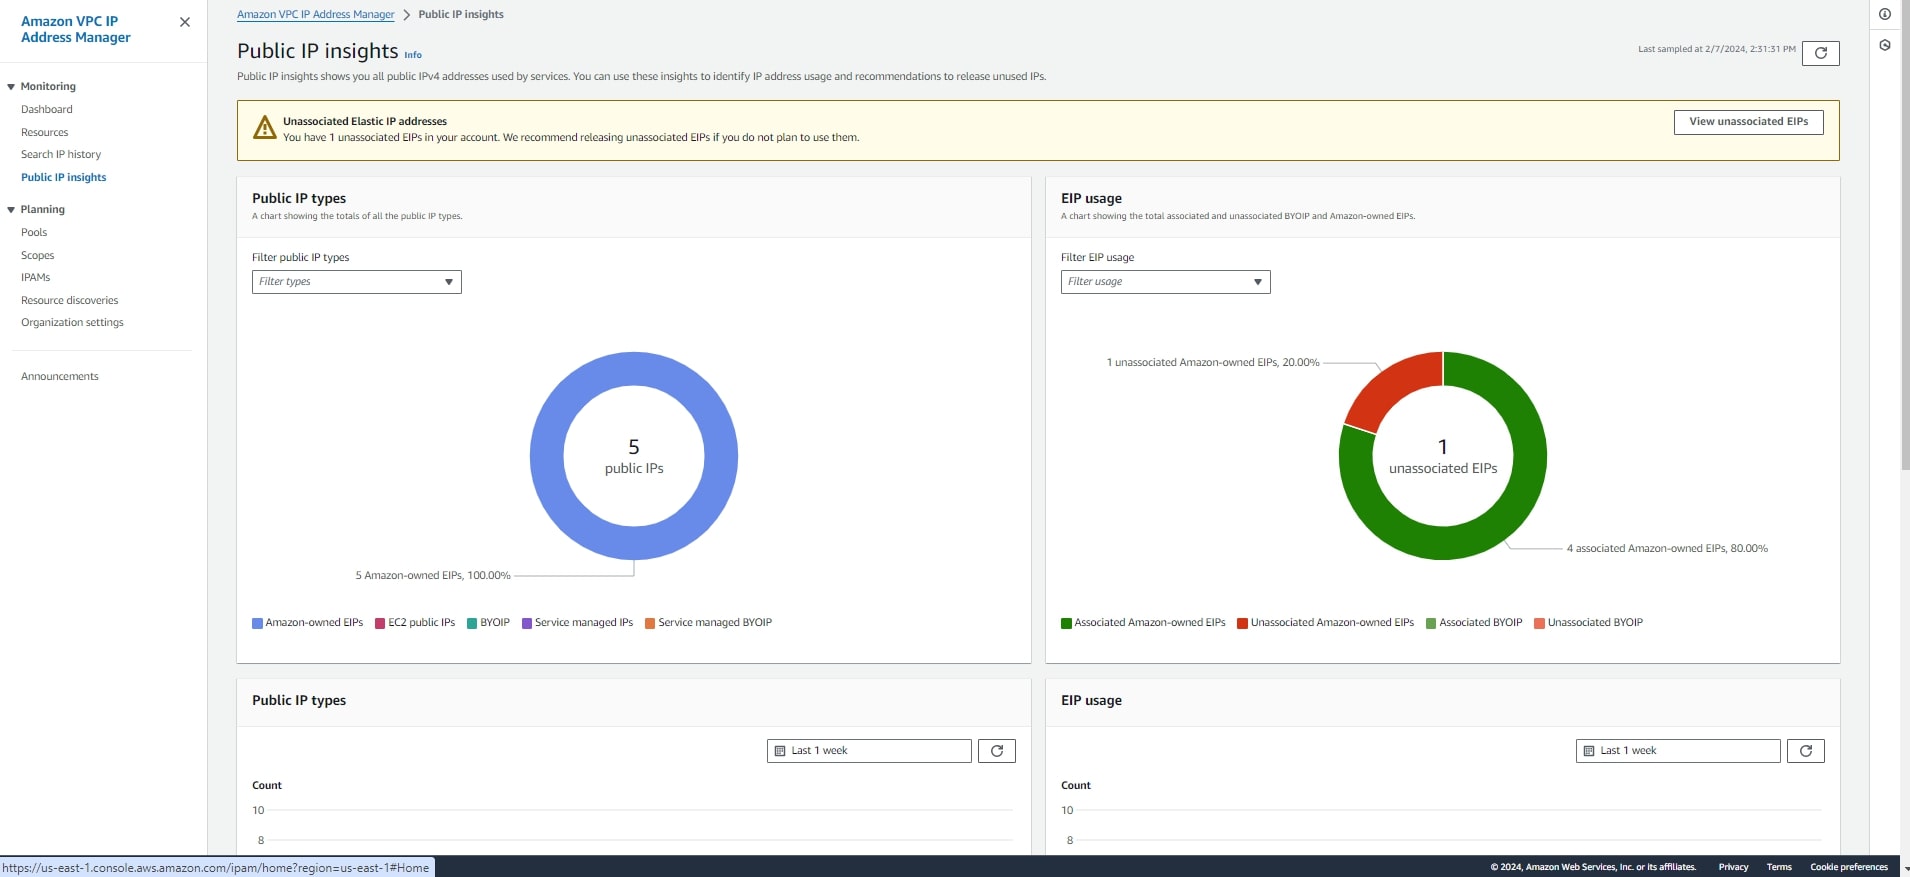
- Details: The same information is visible in the columns of the main Public IP insights pane, such as the Address type and Service.
- Inbound security group rules: If this IP address is associated with an EC2 instance, these are the security group rules that control the inbound traffic to the instance.
- Outbound security group rules: If this IP address is associated with an EC2 instance, these are the security group rules that control the outbound traffic from the instance.
- Tags: Key and value pairs that act as metadata for organizing your AWS resources.
You can also see, sort, filter, and learn more about each of the public IPv4 addresses that you are using: 
From this, you will gain knowledge on how to visualize all of your public IPv4 addresses. This will help you determine if you truly need a public IP for each associated resource. Additionally, you can create a list of IPs that should be removed. Also, you can remove the unassociated EIP immediately.
Best practices
Best practices for Public IPv4 usage optimization